Insights
Automated Invoice Capture Software: 10 Tools Compared, Honestly Rated
10 automated invoice capture tools compared honestly. Includes real cost data, ROI calculator, format support matrix, and an 8-point evaluation checklist.
TallyScan Team

Picture this: it's mid-April, your accountant is asking for last year's business receipts, and you're staring at a zip-lock bag of faded paper slips, a 400-email thread with "Order Confirmation" subject lines, and a vague memory of a client lunch you definitely can't prove happened. Sound familiar?
You're not disorganized. You just never had a system that was simple enough to actually stick with. Most receipt "systems" fail because they require perfect behavior at the worst possible moment—right after a busy day, right before a flight, right when you least feel like filing anything.
This guide gives you a receipt organization system that works with your actual behavior, not against it. Whether you're a freelancer tracking billable expenses, a small business owner preparing for tax season, or just someone trying to stop hemorrhaging deductions, you'll have a working setup by the end of this article.
Before diving into the "how," let's be clear about the "why"—because for most people, this is motivation enough to build the habit immediately.
Every untracked receipt is a missed tax deduction. For a self-employed person in the 22% federal tax bracket, a $100 receipt represents $22 in actual cash savings at tax time. A $1,000 receipt is $220. If you're losing a handful of receipts every month—meals, software subscriptions, office supplies, travel—you're throwing away hundreds or thousands of dollars every year. Not hypothetically. Actually.
Beyond deductions, poor receipt organization creates three other concrete risks:
The good news: the IRS accepts digital copies of receipts. You don't need a filing cabinet. You need a process.
Before you organize anything, you need a clear mental model of what you're organizing. Not all receipts deserve the same attention.
If you're running a business or working as a freelancer, keep receipts for everything you plan to deduct:
| Category | Examples | IRS Schedule C Line |
|---|---|---|
| Office Supplies | Printer ink, paper, pens, postage | Line 22 |
| Software & Subscriptions | Zoom, Slack, Adobe, accounting tools | Line 22 |
| Meals (Business) | Client lunches, team dinners (50% deductible) | Line 24b |
| Travel | Flights, hotels, rental cars for business | Line 24a |
| Home Office | Internet, utilities (proportional to office %) | Lines 18, 25 |
| Marketing & Advertising | Paid ads, sponsored posts, print materials | Line 8 |
| Professional Development | Courses, books, conferences | Line 22 |
| Vehicle Expenses | Gas, repairs, parking (if using actual method) | Line 9 |
Pro Tip: If you're unsure whether an expense is deductible, keep the receipt anyway. It costs you nothing to save it, and it's easy to discard later. Missing a legitimate deduction costs you real money.
For personal finances, focus on receipts that serve a specific purpose:
Once you know what you're keeping, building the system is straightforward.
The right system depends on your volume, tech comfort level, and how your receipts arrive. Most people fall into one of three categories:
| Method | Best For | Pros | Cons |
|---|---|---|---|
| Manual Paper Filing | < 20 receipts/month | Simple, no tech required | Not searchable; paper degrades; hard to back up |
| Digital Self-Managed | 20–100 receipts/month | Searchable, free tools, full control | Requires discipline; manual scanning and filing |
| Automated AI Tools | 100+ receipts/month | Near-zero manual effort; syncs to accounting software | Monthly cost; requires setup; privacy considerations vary by tool |
Most small business owners and freelancers benefit most from a hybrid approach: automate digital receipts (emails, PDFs) and digitize paper receipts with a phone camera, then let the software organize and sync everything.
Whether you use a dedicated app or Google Drive, your digital receipt system needs three things: a consistent folder structure, a file naming convention, and a reliable capture habit.
The most sustainable structure mirrors how you'll search for receipts: by year first, then month, then category.
Receipts/
├── 2026/
│   ├── 01-January/
│   │   ├── Software/
│   │   ├── Office-Supplies/
│   │   └── Meals/
│   ├── 02-February/
│   │   └── ...
│   └── ...
└── 2025/
    └── ...
Keep your category list short—5 to 10 categories maximum. The goal is quick filing, not perfect taxonomy. If it takes more than 3 seconds to decide which folder a receipt goes in, your categories are too specific.
Name every file with the same format: YYYY-MM-DD_Vendor_Amount
Examples:
2026-03-15_Adobe_54.99.pdf2026-03-18_United-Airlines_342.00.pdf2026-03-20_Starbucks-Client-Meeting_28.50.jpgThis format sorts automatically by date, lets you search by vendor name, and tells you the amount at a glance. Your accountant will love you for it.
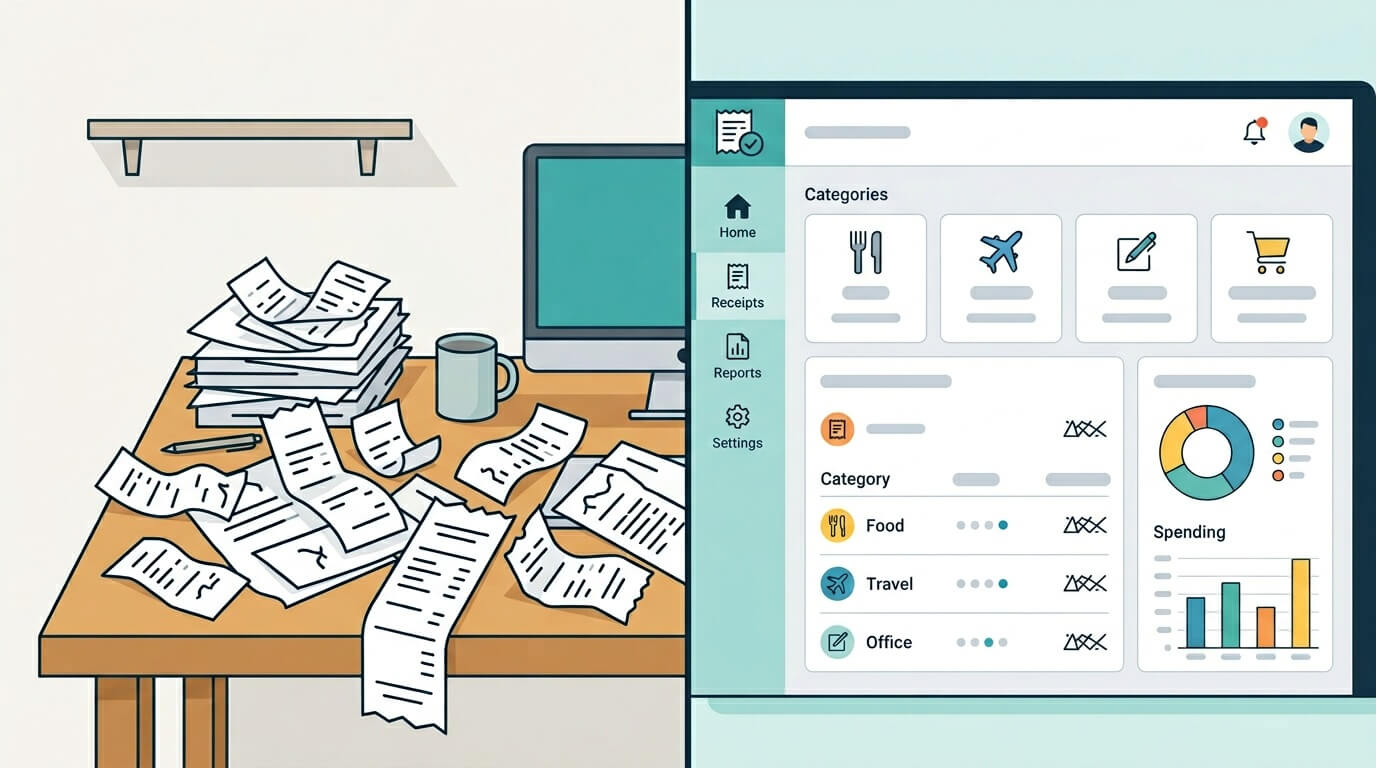
Once your receipts are captured and filed, they should flow directly into your accounting system. If you're using QuickBooks, Xero, or a similar platform, you want receipts matched to transactions automatically—not manually re-entered.
This is where dedicated receipt management tools earn their cost. See our guide on receipt scanning software for a comparison of the best options available in 2026. For a broader look at connecting your documents to your accounting platform, syncing invoices to QuickBooks, Xero, and Google Drive covers the full integration workflow.
Paper receipts are the greatest threat to any digital system. They appear constantly—coffee runs, hardware store trips, client parking—and they always arrive at the worst possible moment.
The solution isn't to handle them perfectly. It's to make the minimum viable action immediate and automatic.
Create one single physical landing zone for all paper receipts: a tray, a small basket, a specific pocket in your bag. The rule is simple: every paper receipt goes there immediately. Not "later." Not "when I get home." The moment you receive it.
This inbox is not storage—it's a temporary holding area. Once a week (more on this below), you clear it: photograph everything and throw the paper away. The act of creating the inbox removes decision-making from a moment when you have no mental bandwidth for it.
For meal receipts at restaurants and retail purchase receipts, the most reliable habit is photographing the receipt before you leave the location. Pull out your phone, take one photo, done. The receipt can go in your pocket or the trash—it doesn't matter anymore.
Most expense apps and receipt tools will extract the vendor, date, and amount from the photo automatically using OCR (Optical Character Recognition), so you don't need to type anything.
Key Takeaway: The biggest cause of lost receipts isn't laziness—it's delay. Receipts lost in wallets, bags, and pockets are receipts that were handled once and not processed. The goal is to handle each receipt exactly once: capture it digitally, and you're done.
For most freelancers and small business owners, the majority of receipts now arrive via email: software subscriptions, online orders, vendor invoices, client reimbursements. Managing these is actually easier than paper—if you set up the right systems.
The simplest approach: create a folder called "Receipts to Process" in your email client, then set up filters to route incoming receipts there automatically.
Filter rules to create:
This keeps your main inbox clean and creates a single location for weekly processing. Every Friday, you review the folder, export PDFs of anything important, and file them in your cloud storage system.
Platforms like TallyScan give you a dedicated forwarding address. You forward any invoice or receipt email to that address, and the AI automatically extracts the vendor, amount, date, and category—then syncs it to your accounting software as a draft bill.
This approach is privacy-friendly because the tool only sees what you explicitly forward. Your personal emails, contracts, and other sensitive communications stay private. Compare this to Option 3 below.
Some tools ask for full OAuth access to your inbox and automatically scan all incoming emails for receipts. This requires zero forwarding effort, but comes with a significant trade-off: the AI has read access to your entire email history, including confidential communications, payroll information, and private negotiations.
For most freelancers and small business owners, the forwarding approach (Option 2) offers a better balance between automation and privacy. The setup takes about 20 minutes to configure forwarding rules, and after that, the process is effectively automatic for recurring vendors.

One of the most common receipt organization mistakes is using categories that don't map to your tax software or accountant's system. When tax time arrives, you end up translating your categories into IRS-compatible line items—doubling the work.
The fix: align your categories to your tax return from day one.
Add to the above:
Pro Tip: Add a "Needs Review" category for anything you're unsure about. Review these with your accountant quarterly rather than at year-end. Catching a miscategorized expense in March is much easier than untangling a year's worth of them in January.
Any receipt system requires two maintenance habits. Skip either one and the system degrades within weeks. Keep both and the whole thing runs on autopilot.
At the end of each day—or immediately after each transaction—handle every new receipt:
The entire capture process should take under 5 minutes. The goal is zero unprocessed receipts at the end of each day. You're not categorizing or reconciling—just capturing. Categories can wait for the weekly review.
Block 15 minutes every Friday (or Sunday evening, whichever you'll actually do) to process everything captured during the week:
This weekly ritual is the difference between a system that works and a system that "sort of worked for a few months." It takes less time than a single tax-season panic session.
For a broader view of how receipt management connects to full bookkeeping automation, see our guide on how to automate bookkeeping for small business.
This is one of the most common questions—and the most commonly misunderstood. Here's the clear answer:
| Situation | Retention Period |
|---|---|
| Standard tax records (most business expenses) | 3 years from the date you filed the return |
| If you underreported income by >25% | 6 years |
| Bad debt deduction or worthless securities | 7 years |
| Property records (home, business assets) | Until sold + 3 years |
| Employment tax records | 4 years |
| No return filed (don't do this) | Indefinitely |
The good news: the IRS explicitly accepts digital copies of receipts as valid records, as long as they are legible, complete, and can be reproduced if requested. Once you've captured a receipt in your digital system, you can shred the paper original.
For most people, a practical rule of thumb is 7 years for everything business-related and 3 years for personal deductions. Digital storage is essentially free, so erring on the side of keeping more is almost always the right call.
Despite your best system, receipts get lost. Here's how to handle it without panicking:
1. Request a duplicate from the vendor. Most businesses—especially retailers and online vendors—can pull up transaction records and resend a receipt if you have an approximate date and payment method. This works for the majority of lost receipts.
2. Use your bank or credit card statement. A bank statement showing the transaction date, vendor name, and amount is secondary evidence that can support a deduction. It's not as strong as the original receipt, but it's far better than nothing.
3. Create a written reconstruction. For small cash expenses where no other record exists, document: the date, the vendor, the amount, the business purpose, and who was present. Keep this note in your records alongside your bank statement. Many accountants use this method for expenses under $75, where the IRS has historically been more flexible.
4. Implement the "scan before you leave" rule going forward. Lost receipts are almost always receipts that were handled once and never digitized. Once you make same-moment capture a reflex, loss becomes rare.
If you're processing more than 30–50 receipts per month, manual filing becomes impractical. A dedicated tool pays for itself quickly in recovered time and deductions.
Key features to evaluate:
| Feature | Why It Matters |
|---|---|
| AI/OCR extraction accuracy | Poor accuracy means manual correction—defeating the purpose. Test with a crumpled receipt and a handwritten one. |
| Accounting software integration | Can it sync directly to QuickBooks, Xero, or your platform? 2-way sync is better than 1-way export. |
| Email forwarding vs. full inbox access | Forwarding is more private. Full inbox access is more automatic. Choose based on your privacy tolerance. |
| Mobile app quality | You'll use this in the field. If the app is slow or clunky, you'll stop using it. |
| Pricing transparency | Watch for per-user or per-document overage fees that inflate the cost at scale. |
For an in-depth comparison of tools designed specifically for invoice and receipt processing, see our article on AI invoice extraction and automation.
The broader principle: the best receipt tool is the one you'll actually use consistently. Start with the simplest option that meets your needs, and upgrade only when you've outgrown it.
Organize receipts into categories that align with IRS Schedule C line items: office supplies, software subscriptions, business meals, travel, marketing, and professional development. Keep business and personal receipts completely separate. Use a dedicated folder per year, with subfolders by month and category. Digital copies are fully accepted by the IRS as long as they're legible and complete.
The most effective digital system combines cloud storage (Google Drive or Dropbox) with a consistent folder structure (Year → Month → Category) and a standard file naming convention (YYYY-MM-DD_Vendor_Amount). Pair this with a receipt scanning app or accounting platform integration to automate data extraction, eliminating manual typing.
Keep business-related receipts for at least 3 years from the date you filed the tax return—this is the standard IRS audit window. For receipts related to property, assets, or cases where income may have been underreported, retain records for 6–7 years. Since digital storage costs are negligible, a blanket 7-year retention policy for all business records is a safe, practical default.
Digital copies are legally sufficient in the United States. The IRS explicitly accepts digital records as long as they are legible and accessible. Once you've photographed or scanned a paper receipt and confirmed the image is clear, you can shred the original. Most accounting and legal professionals recommend going paperless for the searchability, backup security, and space savings.
The best receipt scanning app for small business depends on your workflow. For businesses already using QuickBooks or Xero, a tool that integrates natively and syncs extracted data automatically saves the most time. Key differentiators: AI extraction accuracy (test with real receipts before committing), mobile app speed, and whether the tool requires full inbox access or supports privacy-friendly email forwarding. See our receipt scanning software guide for a detailed comparison.
First, try requesting a duplicate from the vendor—most can reissue receipts for transactions in their system. If that fails, use your bank or credit card statement as secondary evidence and write a brief memo documenting the date, vendor, amount, and business purpose. For cash expenses under $75, the IRS has historically accepted good-faith documentation when the original receipt isn't available. Going forward, photograph receipts immediately to prevent this situation.
Receipt organization doesn't need to be complicated. The businesses and freelancers who stay on top of it aren't more disciplined—they've made the process so simple that discipline is barely required.
To recap the system:
The first week feels like work. By week three, it's automatic. By tax season, you'll have something most small business owners don't: complete confidence in your records.
Ready to stop managing receipts manually? Start your free TallyScan trial and let AI handle the extraction, categorization, and accounting sync—so your 5-minute daily habit becomes a 30-second one.
10 automated invoice capture tools compared honestly. Includes real cost data, ROI calculator, format support matrix, and an 8-point evaluation checklist.
Manual AP costs $10-$15 per invoice. This guide maps where your process breaks down, the seven fixes with the best ROI, and the KPIs to track real improvement.